Oui, Je Vois!

Oui je vois-Art Journal Page-Linda Lenart McNulty (800x591)

Oui, je vois! -Art Journal page by Linda Lenart McNulty

Discovering Art Journaling was for me, like seeing a path, and so the next set of pages in my Art Journal is called “Oui, je vois le chemin!” or “Oui, je vois!” “Yes, I see the path! Yes, I see!”

The precious face of the creature in flight, I found in a magazine last year. She has an expression like my daughter’s when she was young, and is a little peeved about the journey even though the path has finally shown itself from such a height.

I had been playing around recently with a type of hollow script I invented when I was a teen, and I wanted to get back to my roots so I “let it come” as Pooh says, into my work today. I am sure I wasn’t the only inventor of this hollow script, but there is my version. I’ll be using and teaching that to whomever likes such a thing.

Another little piece of nostalgia for me was a chocolate wrapper diamond I saved from a day when I offered chocolate to students in my encaustic workshop (must have been valentine’s day).

I also sculpted up a little head for a Santos to come. I will post photos on that process tomorrow or Monday.

Thanks for checking in!

-Linda

Encaustic Wabi-Sabi Shrines

Linda Lenart McNulty-Encaustic Wabi-Sabi Shrines (800x225)


Since taking a break from the travelling/teaching circuit, I have had more time just to play in the studio, and have been experimenting with many encaustic techniques, yet my favorite by far has been Encaustic Wabi-Sabi, especially as it applies to my Encaustic Shrines (you remember Wearable Encaustic Shrines? Well, these aren’t wearable!

The Encaustic Wabi-Sabi Shrines I’ve been making are larger, and have swinging doors, and glass windows. I have more space to play and explore the interior and exterior spaces because of the larger size. To me, they are just like making tiny encaustic paintings, only I also get to include my love of sculpture and encaustic casting!

As I create each Shrine, I enjoy the rich colors of the pigmented metal leaf, especially because here in the Midwest, my eyes get a bit color-starved this time of year! As I build up the patina and layer intense color, it emits to me a warmth; a spark of life. It gets my juicing flowing, and feeds more creativity into me. One shrine begging the question of the next shrine; each one speaking in different notes of the same song…a bright crisp song, in a place far from here, perhaps Thailand…Mexico…or the Caribbean.

The shrines themselves are very special to me, since my sister, Cheri, who passed to the other side a year ago, loved shrines of all types. We collaborated on some Shrine workshops in the few years before she passed, but we had meant to do more – in fact, we were working on two Shrine books together. One, on casting techniques for encaustic, glass and resin, and another on the history of Santos, which we both had an affinity for, with our Catholic childhood, and our traumatic memories of large religious icons hovering over us, showing us the variety of ways in which a Catholic girl could choose her martyrdom!

In a way, I feel like Cheri is in the studio with me, collaborating with me now, guiding my hand, or at least hanging out and enjoying the process. Well, Cheri, we’re finally doing a few collaborative pieces!

And with that, I’m off to the studio! Shrine-making awaits!

If you would like to check out what I’ve made so far, here is a link to my Encaustic Shrine Gallery and to my Etsy shop where you can purchase your own little burst of Encaustic Wabi-Sabi: 

Linda Lenart McNulty-Encaustic Shrine-Promise of Abraham-Detail Interior (595x800)

Linda Lenart McNulty-Crying Saint Shrine II (721x800)

Have a blessed day and stay warm!

-Linda 🙂

Cavo-Relieveo Workshop: an exploration into coolness

Linda Lenart McNulty cavo-relieveo 8 (800x600)

This slideshow requires JavaScript.

Wow. Cavo was cool. I had done this technique on my own in the past, but presenting it in a workshop setting really launched some cool ideas.

I presented ideas on using photo-transfer, collage, and intarsia on the bottom layers of the cavo painting, laying the leaves and stencils on top, and finishing with opaque layers of pigmented wax. The effects were stunning!

Everyone had their own discoveries-

Marianne, a fiber artist, went for crisp edges and vibrant color;

Lynn experimented in color with her usual genius, reversing the cave effect in one painting for a raised relief, and playing with metal leaf;

Elizabeth, a metal worker, burnished her leaf on so strongly… that we had a laugh, it was as if she was working in metal, as the wax took the shape of an actual leaf!

Mershona, an art therapist, oooed and ahhhhed over the wax, coaxing leaves out of the wax like buried treasure for a mind bogglingly layered effect!

And at the end, during clean up, a local wasp gave up the ghost and dived into the vat of wax headlong, giving itself to the wax, so that Elizabeth could fish it out and display it on her finished piece. What a wild ending to a very cool workshop!

Maybe we’ll see you at the next one!

Thanks for dropping in!

-Linda

Reflecting on Reflections & Looking toward Cavo-Rilievo

Linda McNulty Reflections (800x416)

This slideshow requires JavaScript.

After a long summer, it was wonderful reuniting with old friends in the Encaustic Reflections Workshop this September at FAVA! My favorite team of I’ll-try-anything experimenters showed up- yes, that would be…Julie and Jacob! The mother and son duet that keep us entertained. Also, the talented fiber artist, Marianne, came on Saturday to bust a few moves, while meditative Lynn fell into Picasso mode on Sunday. And I heartily enjoyed the sunny, open-to-anything disposition of my totally-new-to-encaustics-what-is-going-on-here student, Theresa, and new-to-encaustics, capable FAVA glass instructor, Sherri.

Even FAVA’s media-artist-extraordinaire, Regina, gave encaustic painting a whirl on Saturday. She was there to document our encaustic process for FAVA, but you could see the wax begin to do its work on her; intoxicating her and drawing her in, until she could stand it no longer and dove in with a brush!

I demonstrated many types of Reflective mixed media, and I was happy to see everyone incorporate areas of Metal Leafing and Metallic Transfer Scribbles and Script into their work.

Here are some images from the workshop for you to peruse. This will give you a feel of the process of the workshop, although all the photos I have are from Sunday (my apologies Marianne!).

I’d like everyone who wants to come to next month’s Encaustic Cavo-Rilievo workshop, to spend time beforehand, opening your eyes to shapes, patterns and textures all around you. Jot down what inspires you into a notebook (the fall grasses on the side of the road- the weave of a tablecloth-the shape of a pear), and take a few photos on your phone. This will give you something to launch from when we’re in class and you have every material at your disposal, but your mind is blank. That’s when an artist looks at their notebook and into the phone images gathered- and voila! You’re ready to go!

And at the last minute, let’s gather some fall leaves and grasses, for we will be making impressions from what we gather. We want to keep the ridges in the leaves, and not press them flat for this workshop, so we don’t need to gather them ahead of time. And there will be plenty to share, as always. Remember, all you really need is a ready mind and a set of hands, so come with notes, or come as you are; just come!

October will be fun! See you there!

  • Linda

Monthly & Locally


Spring, where are your springs! When will you spring upon us! Have we begun to rise from our winter slumber?

Winter Slumber? Are you kidding? If your winter was like mine, you were running nonstop- jumping on and off planes and generally making a disaster area in your studio! Well, I’ve decided to dig myself out of the pile of suitcases and have set my mind to teaching only locally for a while.

With this in mind, I have written up my schedule of  workshops for the year. These are two-day workshops, once a month- the last weekend of each month. I will be presenting fundamental encaustic painting techniques in a series of fun, creativity-boosting weekends.  I do hope this will encourage some of you out-of-towners to travel out to my cute artists town, where things are always hoppin’ and stay for one of the weekends of encaustic painting! Workshop sizes are always small, so you’ll get tons of individual attention.

Also currently, I am sorting and packing everything in my house, as we are putting our beautiful country home up for sale, and moving off to town (two whole miles away!). We’re trading our fishing pond full of bullfrogs for sidewalks, and our fields of waving grasses for cafes, I suppose.

And then, when the dust of this furiously busy season has settled, I’m hoping to find myself sipping lemonade, and again listening to birds and bees, lounging merrily with artist friends, and walking to concerts and performances. This is my mind’s reward for all of this tearing up and stripping away of my house and my schedule. I want to get to the core of the good stuff. For me, part of that will be teaching Encaustics- monthly & locally.  I am really excited. Anybody want to buy a cute country house 2 miles from an artsy college town? It comes with a Studio!

Thanks for stopping in!

-Linda


Encaustic Wabi Sabi Workshop – Warm and Wonderful

Encaustic Wabi Sabi-Linda Lenart McNulty (640x385)

This slideshow requires JavaScript.

Last Saturday the art room at Oberlin’s historic FAVA building was transformed into an encaustic paradise, when ten artists from the Cleveland area took my Encaustic Wabi Sabi workshop!

The students felt like kids at a candy store, only the candy was stained tea bags, onion skin and mulberry bark paper, dead flower heads, petals and leaves, small twigs and porcupine quills!

There was an overflow of oil paints, encaustic medium, smiles and laughter as the students shared colors, visions and surprises on their waxy griddles.

Every student found their own approach and their own voice in their color and textural choices they made, and no two artists’ work looked alike!

After demos and a good three hours of play, the students packed up their goods and we all enjoyed looking at and sharing in each others’ work. I was truly amazed what the students invented and developed in their short time together and I am looking forward to running this workshop again.

Actually, in the approaching 4 week long series of encaustic classes I am facilitating at FAVA, beginning next Saturday, first thing on the agenda is to show the students how to turn their beautiful Wabi Sabi Collages into Paintings. There are still a few seats open if anyone is interested in signing up. In the class series, all of your questions will be answered on encaustic art and process, and there is plenty of time to stretch out and find your voice, so to speak. It’s a good place to start your encaustic journey. Maybe I’ll see you there!

Thanks for stopping by!

Linda

Making Your Own Encaustic Medium

When I am teaching a workshop, I am always asked about the process of making your own Encaustic Medium. I have decided to lay it all out for you here, so you can decide for yourself whether to invest in the process, or leave it to the professionals!

It’s really just a matter of deciding if you’ll be using great quantities, in which making your own would then be a good idea, and if you have the time and the interest. I personally love making Encaustic Medium. It warms me up to the play at hand; I find it relaxing…and you can’t beat the smell! Besides, I (and my students) would quickly go broke if I didn’t make it myself for my workshops. It really keeps the cost of an encaustic workshop down!

Here’s what you’ll need to do it right:

  • Unbleached pharmaceutical grade beeswax (buy at least 5 lbs.)
  • Damar Resin (1 lb.)
  • 2, yes 2 (I use 3, even better!) Electric Skillets with lid and temperature gauge
  • 1 measuring cup you can ruin (one or two cup quantity)
  • 1 Wooden Spoon you can ruin
  • 1 Sieve you can ruin
  • Microfiber Cloth (look in the automotive section of the drugstore) 
  • Paper Towels
  • Nitrile disposable gloves 
  • Optional: Silicone Mat or Silicone Bowl
  • Ventilation (I have a vented kitchen fan above my encaustic station. You might use a window with a box fan blowing out. By the way, that’s a bad plan for those of us who have actual winters!)

Here we go! Click on the first picture to get the full tutorial:

I usually make two batches at a time in my three skillets, and it’s a bit like a juggling match. If I’m really cranking, I do my last pour into a Silicon Bowl, then I wrap, label and stack my beautiful slabs. I was a little low on supplies when I made this tutorial so I didn’t give you the grand circus of wax juggling and pouring. At any rate, I hope you enjoyed yourself and maybe learned something!

Until next time! –Linda 

Encaustic Wabi Sabi

I have begun playing around with Encaustic Wabi Sabi and I love it! The process is very loose and energetic. I have been drying out Tazo tea bags and have discovered that tea bag paper is exquisite to use with Encaustic Wax. Also, you can see I have been using the tea labels! Since I am a colorist, I have decided my new body of work will focus on the powerful use of one color (of course this one color will have many complex undertones, underpainted layers, etc.) and the forms I paint will be simple, scratchy, overworked areas of dense color and layered tea paper. I hope you like it – I really do, and I have begun to save all my tea bags, religiously drying and emptying them for my future students to play with.

I am teaching an Encaustic Wabi Sabi one day workshop at our local arts center, FAVA, right here in Oberlin, Ohio, on Saturday, March 1st, 2014. Right on the heels of that workshop will be four Encaustic Workshops (Saturdays) where I will guide my students through anything our collective hearts’ desire! Take one or all! Really, shoot out to Oberlin, Ohio if you like! I’ll be here conjuring up a world of discovery in wax!!!!!

Thanks for checking in!

Linda

Local Encaustic Workshop… an encaustic escape!

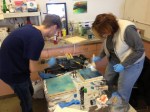
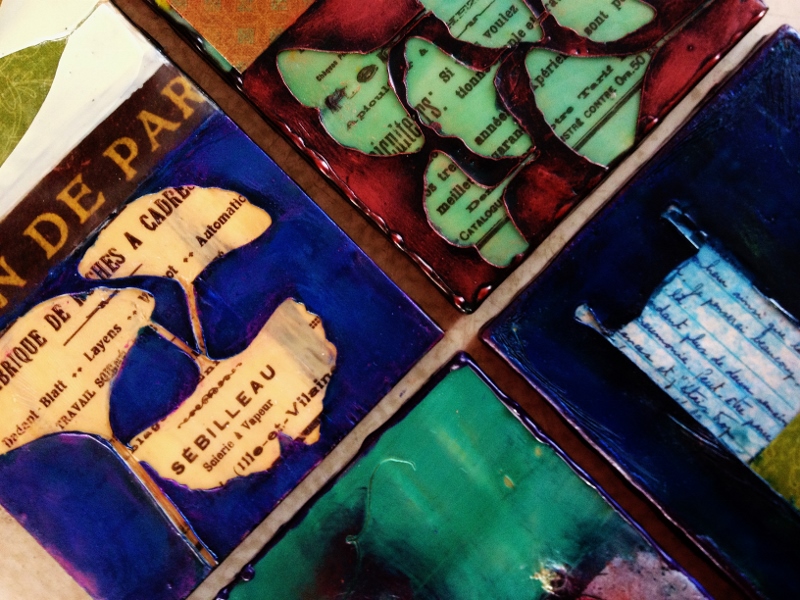
We’re having a relaxing and rejuvinating time over at FAVA, the local arts center in beautiful Oberlin, Ohio! Six local artists have come to play in wax and unwind their minds on six consecutive Saturday afternoons; and while the town rushes around below our second story window, we hide ourselves away, layering warm encaustic wax, fusing with torches; and playing with color, design and texture in our encaustic paintings.

Each artist has forged a path of exporation all their own, with direction and guidance…and lots and lots of mixed media and tools.

Each afternoon I demonstrate a few techniques, which are absorbed and reinvented by some, and left for another time by others, as they continue on a path laid out for them from the week before.

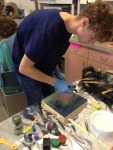
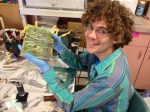
Jacob and Julie are furiously productive on their shared griddle, their limbs a blur, painting, fusing and burning in with fire; texturing and building up layers of waxy color.

Jacob is working in reliquaries, bringing in bits of his hair and his childhood teeth to bury, or objects to cast or build upon. One very notable thing about Jacob: each week he chooses an art book from FAVA’s extensive library and uses the artistic styles and palettes as inspiration. His work is an ever evolving experiment, and we love seeing what he has come up with by the end of each session!

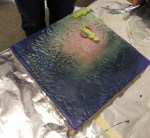
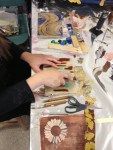
Julie has been layering images of her ancestors in pale, muted colors, using phototransfer, mark-making, and collage techniques. She seems to be always one step ahead of the lessons and isn’t afraid to forge her own path, jumping in with both feet! (She is Jacob’s mother so you see where he gets it!)

James and Elizabeth share another warm griddle. Their table is ponderous and meditative, sitting next to the blur that is the J & J table.

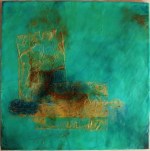
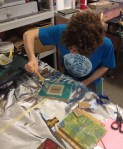
James is an Origami Guru and pioneer, and everything he touches morphs into geometric shapes and infinite cycles of pattern upon pattern. You’ve heard of King Midas? Yes, well James intricate encaustic paintings have become gold in his hands. He builds up layers and masks in line and form.

Elizabeth, a local sculptor, is all about texture and process, and has slowly and steadily been uncovering what this encaustic painting is all about. Once she discovered layering in and building up tea, she was a gonner and found her encaustic voice.

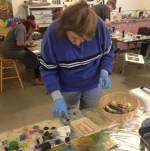
Cara and Lynn share the last griddle, and their table is even more ponderous and zen-like.

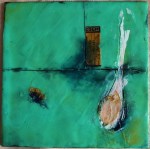
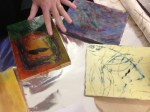
Cara, an oil painter and master of the drawing, plays with curving and collaged organic forms, and has really taken to slowly incising thin lines in layered wax, which excavates surprise patterns and color.

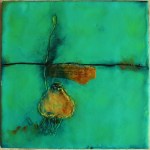
Lynn, a colorist with a painterly style, is deliberate in her exercises, trying out new techniques, and applying her new-found knowledge into her paintings, which have beautiful, subtle color musings, and tiny detail.

We all look forward to these Saturday Play Dates, coming together with a sigh of relief after hectic weeks, unwinding and encouraging each other while we work, unpeeling the stress and reveling in our laughter, joy and playful experiments. It seems I should call this workshop, The Encaustic Escape!

– Linda

Springtime in Appalachia- or is it?

Appalachian Spring (640x451)

Appalachian Spring is playing on the radio. This is a gorgeous classical piece that, being a dancer, is true to my heart. It was composed by Aaron Copland and performed by Martha Graham and her dancers back in the 40’s, and was quite the pioneer piece to its modern audience.

I remember hearing an interview with Aaron Copeland where he said that he would laugh because his audience members would approach him to compliment him on composing a piece which so perfectly depicted Springtime in Appalachia. He laughed because he knew that he and Martha had picked the title at random after his piece and Martha’s ballet was already completed.

That’s the funny thing about creating art…

Is the audience correct to judge what content they take from the piece, or is the artist correct? Although the artist corners and defines a concept within their piece, I believe the artist does not have full awareness of what they have created, and that the audience helps define what was created. In this scenario, the artist really cannot have the final say on what the piece is about.

When I was a performance artist, we would create movement to silence, layer music on top of the movement, then perhaps add the spoken voice and costume. What exactly were we creating? I saw each piece as a set texture of experience in time.  The outcomes were beautiful, to be sure, and went beyond the scope of what we, the artist, could fully understand. We learned from our own pieces after they were made. We learned right along with the audience. That’s why after an artist creates a piece, there is a time of basking in this beautiful creation, larger than the artist. The artist always wants to talk about the piece with a trusted friend, to discuss his/her perception of the piece, and see if it matches the artist’s. Both friend and artist exchange wonder and awe and both grow their minds (and maybe even blow their minds!) on the manifestation of concepts that may have been quite hidden during the making of it.

Whether it be one medium or many, the piece is larger than the artist, and the artist should recognize, that although he/she was the creator, he/she was certainly not the source. If the artist were the source, why would it be so fascinating to them? I think the fact that art is endlessly fascinating proves that the source is from a mind larger than our own.

God’s mind is the source- but the artist’s mind and soul shapes it. The process of channeling God’s mind is the artist’s prerogative and delight, which explains why artist put up with starving for their craft!

The craft of the artist is in the shaping of a concept into a manifested form, and using life’s forms in new ways to open the viewer’s eyes. Ah, but the artist’s eyes get opened too. So, Mr. Copland, you have truly composed a glorious piece, but if the audience members say it’s Springtime in Appalachia, so be it.