Charcoal Drawing and Flemish Pears

Since teaching Drawing on Encaustic Wax, I have been playing around with approaches to the still life in my studio. What I mean by this is that I am reawakening my love of drawing still life. As artists we are so bombarded with imagery today- much of it someone else’s imagery: historical imagery or found imagery; and we forget that a portion of an artist’s time used to be just drawing or painting a still life or model in one’s studio.

I mean sometimes you just get sick of drawing from photos or pulling up google images. Well guess what- there’s a whole world of artists working from small still lives every day. But it’s the oil painters and the die-hard pencil artists. It’s just not the encaustic artists. Why?

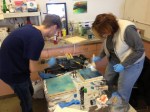
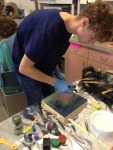
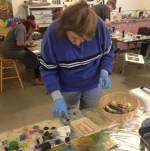
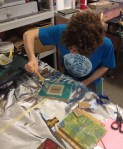
It’s just not the way we usually approach encaustic painting. Last month, my student Jacob commented, “we should have a live model to paint!” and I said “Yes!” I totally agree.  But it seems tricky somehow, juggling our hot griddles, gloves, paints, ventilation, and working out our ideas in a chunky brush, while we keep our live model happy and our eyes darting back and forth-model to painting-model to painting. But I think it is do-able! Why not?

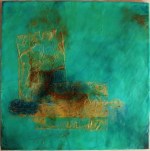
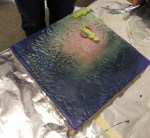
Since then, I have been engrossed in researching Flemish Oil Painting, and working to transfer these concepts into an encaustic approach. I thought the way the Flemish approached underpainting and layering was particularly applicable to the way we encaustic artists use layering, glazing and burnishing.

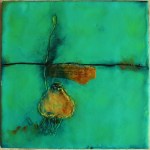
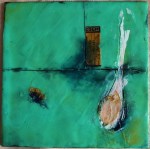
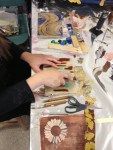
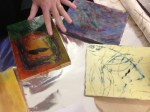
So I’ve taken the pear as my current subject (being March that seems the best option for organic form choices) and taken to daily charcoal drawings and encaustic paintings of them. I have started to share my ideas and teach a few friends my approach; and being a documenter, I am collecting a variety of processes that I hope to compile and share in a book of some sort.

If this sparks anyone’s interest, let me know with a comment. I tend to run ahead of the curve- I am pulling in ideas that are old school to oil painters and applying them to this slippery, changing landscape of encaustic art. We’ll see what happens. I’ll keep you posted. Happy Creating!

-Linda

Monthly & Locally


Spring, where are your springs! When will you spring upon us! Have we begun to rise from our winter slumber?

Winter Slumber? Are you kidding? If your winter was like mine, you were running nonstop- jumping on and off planes and generally making a disaster area in your studio! Well, I’ve decided to dig myself out of the pile of suitcases and have set my mind to teaching only locally for a while.

With this in mind, I have written up my schedule of  workshops for the year. These are two-day workshops, once a month- the last weekend of each month. I will be presenting fundamental encaustic painting techniques in a series of fun, creativity-boosting weekends.  I do hope this will encourage some of you out-of-towners to travel out to my cute artists town, where things are always hoppin’ and stay for one of the weekends of encaustic painting! Workshop sizes are always small, so you’ll get tons of individual attention.

Also currently, I am sorting and packing everything in my house, as we are putting our beautiful country home up for sale, and moving off to town (two whole miles away!). We’re trading our fishing pond full of bullfrogs for sidewalks, and our fields of waving grasses for cafes, I suppose.

And then, when the dust of this furiously busy season has settled, I’m hoping to find myself sipping lemonade, and again listening to birds and bees, lounging merrily with artist friends, and walking to concerts and performances. This is my mind’s reward for all of this tearing up and stripping away of my house and my schedule. I want to get to the core of the good stuff. For me, part of that will be teaching Encaustics- monthly & locally.  I am really excited. Anybody want to buy a cute country house 2 miles from an artsy college town? It comes with a Studio!

Thanks for stopping in!

-Linda


Making Your Own Encaustic Medium

When I am teaching a workshop, I am always asked about the process of making your own Encaustic Medium. I have decided to lay it all out for you here, so you can decide for yourself whether to invest in the process, or leave it to the professionals!

It’s really just a matter of deciding if you’ll be using great quantities, in which making your own would then be a good idea, and if you have the time and the interest. I personally love making Encaustic Medium. It warms me up to the play at hand; I find it relaxing…and you can’t beat the smell! Besides, I (and my students) would quickly go broke if I didn’t make it myself for my workshops. It really keeps the cost of an encaustic workshop down!

Here’s what you’ll need to do it right:

  • Unbleached pharmaceutical grade beeswax (buy at least 5 lbs.)
  • Damar Resin (1 lb.)
  • 2, yes 2 (I use 3, even better!) Electric Skillets with lid and temperature gauge
  • 1 measuring cup you can ruin (one or two cup quantity)
  • 1 Wooden Spoon you can ruin
  • 1 Sieve you can ruin
  • Microfiber Cloth (look in the automotive section of the drugstore) 
  • Paper Towels
  • Nitrile disposable gloves 
  • Optional: Silicone Mat or Silicone Bowl
  • Ventilation (I have a vented kitchen fan above my encaustic station. You might use a window with a box fan blowing out. By the way, that’s a bad plan for those of us who have actual winters!)

Here we go! Click on the first picture to get the full tutorial:

I usually make two batches at a time in my three skillets, and it’s a bit like a juggling match. If I’m really cranking, I do my last pour into a Silicon Bowl, then I wrap, label and stack my beautiful slabs. I was a little low on supplies when I made this tutorial so I didn’t give you the grand circus of wax juggling and pouring. At any rate, I hope you enjoyed yourself and maybe learned something!

Until next time! –Linda 

To Bead True Blue 2014

Tucson (640x404)

To Bead True Blue is one of my favorite art retreats. Tucson is a perfect balmy and sunny 70*; women arriving have a skip in their step as they wheel through the halls with their little supply suitcases, with high expectations. Those who come, take workshops to unwind and release their spirits and voices. You can feel the hallways and classrooms humming as each individual sets off to make their artistic dream come true. The teachers are kind and funny, friendships and bonds are instantly forged by all, and the classrooms overflow with the energy of connecting and creating.

And this year my Encaustic students are in for a real treat.

I am teaching four Encaustic workshops, each of them highlighting a different aspect of Encaustic technique, and they’re all going to be energizing and fun! The coolest thing is that this year we’ll do a full Encaustic painting in two of my classes (Word Shield and Cryptic Encaustic) and then translate the painting into a piece of jewelry.

And my classes are all 6 hours this year, so we’ll have more time to play, expand our skills, discuss ideas and share without the rush.

Wearable Encaustic Shrines is on February 2nd. In this workshop we will use tins and bezels to create a variety of small shrines using Encaustic casting, pouring, collage, and faux-finishing techniques with colorful Encaustic wax inside the bezels and tins. And I’ll show you some fun ways to make raised and recessed areas in the wax that are very shrine-like. 

Word Shield is on February 3rd. In this workshop we will play with layering and scraping Encaustic wax colors to get an antique look, I’ll show you how to photo transfer an image onto the painting (for those who want a portrait under their script), and then we will write in metallic script on the surface of the wax- we will do this process first as an Encaustic painting, then as a piece of Encaustic jewelry .

Cryptic Encaustics is on February 4th. In this workshop we will play with layering beautiful transparent colored Encaustic wax, then use deep stamping and excavating on the surface- first as an Encaustic painting, then as a piece of Encaustic jewelry.

Waxing Images is on February 5th. In this workshop we will make multiple Encaustic pendants, playing with colorful imagery, using wax inlay (intarsia), and wax photo transfer. These pendants are a lot of fun, as the size is very unintimidating and the technique very childlike and friendly.

I am really looking forward to meeting my students and having some Encaustic fun so I hope you’ll sign up (go to my workshop page) and we’ll see you there!!!!

-Linda

Encaustic Wabi Sabi

I have begun playing around with Encaustic Wabi Sabi and I love it! The process is very loose and energetic. I have been drying out Tazo tea bags and have discovered that tea bag paper is exquisite to use with Encaustic Wax. Also, you can see I have been using the tea labels! Since I am a colorist, I have decided my new body of work will focus on the powerful use of one color (of course this one color will have many complex undertones, underpainted layers, etc.) and the forms I paint will be simple, scratchy, overworked areas of dense color and layered tea paper. I hope you like it – I really do, and I have begun to save all my tea bags, religiously drying and emptying them for my future students to play with.

I am teaching an Encaustic Wabi Sabi one day workshop at our local arts center, FAVA, right here in Oberlin, Ohio, on Saturday, March 1st, 2014. Right on the heels of that workshop will be four Encaustic Workshops (Saturdays) where I will guide my students through anything our collective hearts’ desire! Take one or all! Really, shoot out to Oberlin, Ohio if you like! I’ll be here conjuring up a world of discovery in wax!!!!!

Thanks for checking in!

Linda

Local Encaustic Workshop… an encaustic escape!

We’re having a relaxing and rejuvinating time over at FAVA, the local arts center in beautiful Oberlin, Ohio! Six local artists have come to play in wax and unwind their minds on six consecutive Saturday afternoons; and while the town rushes around below our second story window, we hide ourselves away, layering warm encaustic wax, fusing with torches; and playing with color, design and texture in our encaustic paintings.

Each artist has forged a path of exporation all their own, with direction and guidance…and lots and lots of mixed media and tools.

Each afternoon I demonstrate a few techniques, which are absorbed and reinvented by some, and left for another time by others, as they continue on a path laid out for them from the week before.

Jacob and Julie are furiously productive on their shared griddle, their limbs a blur, painting, fusing and burning in with fire; texturing and building up layers of waxy color.

Jacob is working in reliquaries, bringing in bits of his hair and his childhood teeth to bury, or objects to cast or build upon. One very notable thing about Jacob: each week he chooses an art book from FAVA’s extensive library and uses the artistic styles and palettes as inspiration. His work is an ever evolving experiment, and we love seeing what he has come up with by the end of each session!

Julie has been layering images of her ancestors in pale, muted colors, using phototransfer, mark-making, and collage techniques. She seems to be always one step ahead of the lessons and isn’t afraid to forge her own path, jumping in with both feet! (She is Jacob’s mother so you see where he gets it!)

James and Elizabeth share another warm griddle. Their table is ponderous and meditative, sitting next to the blur that is the J & J table.

James is an Origami Guru and pioneer, and everything he touches morphs into geometric shapes and infinite cycles of pattern upon pattern. You’ve heard of King Midas? Yes, well James intricate encaustic paintings have become gold in his hands. He builds up layers and masks in line and form.

Elizabeth, a local sculptor, is all about texture and process, and has slowly and steadily been uncovering what this encaustic painting is all about. Once she discovered layering in and building up tea, she was a gonner and found her encaustic voice.

Cara and Lynn share the last griddle, and their table is even more ponderous and zen-like.

Cara, an oil painter and master of the drawing, plays with curving and collaged organic forms, and has really taken to slowly incising thin lines in layered wax, which excavates surprise patterns and color.

Lynn, a colorist with a painterly style, is deliberate in her exercises, trying out new techniques, and applying her new-found knowledge into her paintings, which have beautiful, subtle color musings, and tiny detail.

We all look forward to these Saturday Play Dates, coming together with a sigh of relief after hectic weeks, unwinding and encouraging each other while we work, unpeeling the stress and reveling in our laughter, joy and playful experiments. It seems I should call this workshop, The Encaustic Escape!

– Linda